Showing posts with label orange. Show all posts

Monday, November 1, 2010

A Halloween Anniversary!

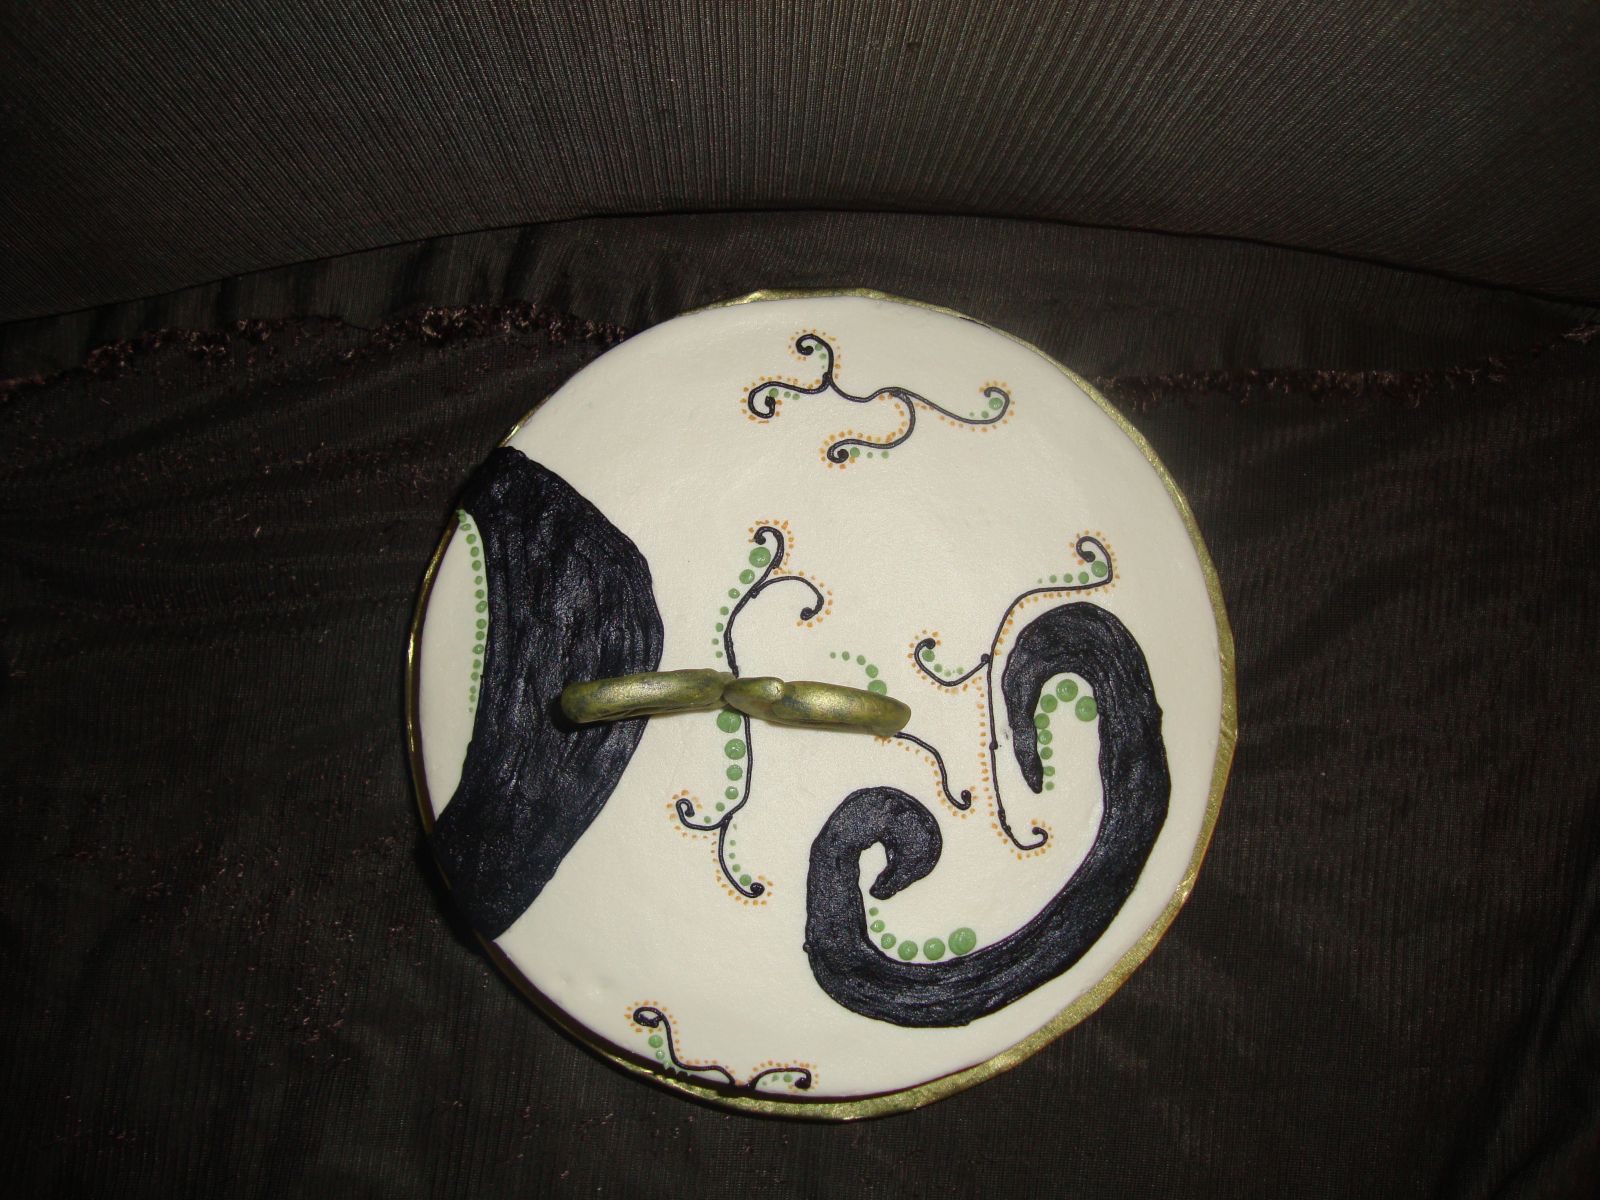
This cake was pretty straight forward, and I very much enjoyed it.  I used the leftover navy blue BC from the last cake and made black by adding yellow, red, and brown coloring gels and more black powder.  The cake itself is two 10" decadent chocolate cake layers with vanilla BC filling and frosting.  See the baking powder can?  That's for size analysis (Thank you Christyl!  I keep forgetting!)  The numbers on top are gumpaste painted with gold edible shimmer dust.

This cake also had a specialty sturdy box.  I hate commercial cake boxes.  Something always goes wrong with them.  I'm so glad I've started making my own.

Sunday, October 17, 2010

My first Elmo Cake

This cake was made for a party at Cartwheels and Coffee.  The Elmo is RKT covered by tip 13 stars.  The cake itself is 2-10" yellow cake rounds with vanilla buttercream filling and frosting.  There is a little cake board under Elmo held up by dowels to provide support for the weight of the RKT.
When I made the RKT I used too much cereal and it was diffucult to pack tightly enough.  What I do to pack RKT is take some plastic wrap, coat it in a little shortening or butter, coat my hands as well, and grab a large amount (about 3x as large as I want it to come out after packing).  I set it down in the center of the plastic wrap, wrap it up, and start crushing.  After I shaped the body and head, I put a wooden dowel in through the top of the head down through the bottom of the body to pre-make a hole for it.  I learned that this was a good idea on the Frog and Monkey cake.  I left the dowel in until it was time to decorate Elmo.  It looked really funny as just RKT sitting in the fridge.  We had a friend come over the night before the cake was due and he thought I had a voodoo doll hanging out in there.
The arms are being held on with uncooked spaghetti pasta.  His mouth is a smile made of black fondant.  Interesting side note, I had an awful time dying the frosting red.  Awful.  I ordered two different kinds of food dye online the night before this cake was due, knowing it wouldn't get here in time but knowing I'm not going through this again.  After reading a whole lot online, I found that Americolor Super Red is the best for going straight to red, so I ordered some of that as well as dye powder.  We'll see how it works.  Anyway.  I piped stars all over his body and arms, and the front and top of his head.  I left the back bare so I could use that to support the head when I pushed the spaghetti in to help hold on the eyes and nose.  They are simply fondant rolled to the right size and shape.  The pupils are black fondant.  I piped the back of his head in, applied the fondant star cutouts, and piped a shell border with #22.  Then it was done and I delivered it to my favorite place to hang out with my kiddo, Cartwheels and Coffee in Carytown.  Chris (my main man at CnC) said he had a #1 candle for the cake.  I wish I had a picture of it with the candle in it!

Friday, July 9, 2010

Happy Un-Birthday to Aquarius!

This cake, while quite small, is just TOO CUTE!  I found it on SugarMamaTreats.com and had to try out a version of it.
It's a 2 layer, 6" Decadent Chocolate cake with vanilla butercream filling and frosting with fondant and gumpaste decor.  The "water" is fondant, and the Aquarius symbol and jar are gumpaste.  I started this cake by making the gumpaste structure first.  I freehand drew what I wanted and cut it out, let it dry, then painted it using color gel and vodka.  I use vodka instead of water because it both leaves a cleaner line, and dries quickly and completely.
Using water on gumpaste sometimes causes collapse.  Anyhow.  I achieved the shimmery gold effect by dry painting shimmer dust onto the places I wanted it and let it dry thoroughly again.  Then I baked the cakes, filled, stacked, and frosted.  I used the paper towel technique I posted about on the cake, then let it set in the fridge until it was hard.  The fondant I split into three sections and colored each one differently for the multi-colored effect.  My husband and I watched True Blood (HBO series) while I painstakingly made little snakes of fondant and curled them around upon themselves to set on the cake and the board.  I used fondant for the lettering as well.  This cake is a birthday cake for someone whose birthday it ISN'T, so it was just a super fun cake to let myself experiment with.

Sunday, March 21, 2010

My Busy Weekend, Part 1

I'm still recovering from this weekend.  I had three cakes due, one on Friday, one on Saturday, and one due today (Sunday).  I'm not sure even how to start describing it all, so I guess I'll just dig in!
  I had a Striped Kitty Cat Cake due on Friday.  It's yellow cake with chocolate filling and crumbcoat, covered with vanilla buttercream applied with the grass tip to look like fur.  The inspiration photo was pretty boring and the Client pretty much gave me free reign with design, which was nice.  Two of the cakes this weekend were for her.  She has twins that are turning 8, and she was inspired by the figure 8 shape in the two cakes she picked out.  I decided to do a tye-dyed fondant cake board to add flair.  Baking and layering was very simple, and this was a pretty straightforward cake.  It did take me a while to stick the "hair" on (not to mention my carpal tunnel was going nuts on me by the end!) but it was a very relaxing activity.  I did end up putting green cat eyes on it after I took the picture, but forgot to take another afterward, so this is what I have!  As I was looking at the inspiration picture vs. the picture of my cake after she left, I realized I didn't add whiskers!  I hope nobody really noticed...well I guess I just called myself out on it anyway!
The next cake was due on Saturday.  There is such a long and drawn out story to this cake, so I'll condense it as much as possible.  The Clients were a very sweet couple and they wanted the Bucket of Bud Light cake.  It looked pretty straightforward so I went to work.  Everything went wrong that could!
During our consultation, I told them I'd use rice krispie treats covered in chocolate for the bottles...then I saw something online that I really wanted to try and I went out and bought this paintable latex molding compound and spent two days making a mold out of a beer bottle and letting it dry.
Then I poured super hot sugar into the mold and these wonderful bottles came out!  I was so excited, so I wrote the client and asked if she wanted the sugar bottles...good thing I did, because she was pretty excited about the rice krispie treat/chocolate combo!  I do have to admit, the RKT bottles were much more tasty!  So I set about making the bottles by making a 1/3 recipe of regular RKT and molding it to look like a very skinny bottle (to allow for the extra layers of chocolate to be painted on top).  Each bottle took 1/3 recipe of RKT.  The secret to making them hold their form is to pack them very tightly!
Then I coated each one with milk chocolate, two layers, by brushing it on.  Mmmmmmm.  The labels on the bottles are painted rolled buttercream.  The labels on the top were SO tiny, even my super small brush was too big to use very easily!  I did multiple labels trying to get them better...with no avail.  Instead of freaking out, I just went with the best I could do.  I overshot my abilities on this one, I think!
When the time came to stack the tiers (3 tiers of 2-layer chocolate cake with strawberry filling and vanilla buttercream frosting) I realized I had drastically underestimated the sheer weight and top-heaviness of the cake.  I tried setting the bottles in the top and the whole top tier broke into little pieces.  And I realized that the party was in Petersburg and there would be a stop in-between...the cake needed strength!  So that night I stayed up until 2am (usual bedtime on the weekends?  10 LOL) baking more cakes and re-stacking using 1/4" dowels hammered through the reinforced 2-layer foam boards (replaced the cardboard I had used before) and into the new 4-layer (up from 2) foam cake board at the bottom.  I measured, cut, and sharpened the dowels and actually used a HAMMER to push them through all the layers.  Then I made a pilot hole in the the bottles by pushing a dowel through the bottom center of all the bottles and placed those on four of the five 1/4" dowels.  The top tier broke into pieces AGAIN.  The picture is right before things got really ugly.  I realized the bottles had to set very lightly into the cake, not set in as was described in the tutorials I'd seen.  At this point I was going nuts, so I boiled some sugar and corn syrup to the hard crack stage and poured it into the cracks.  MISTAKE!  lol I am so lucky I didn't ruin the bottom two tiers.  I was so tired at this point that I put it in the fridge and went to bed.  The next morning I woke up at 7am and started baking again.  I made the label for the bucket out of regular fondant and coloring gel and placed it.
The ice is 1/2c sugar and 1/2c corn syrup melted down and boiled until just before it turns yellow.  I crinkled up a piece of nonstick tin foil (nonstick part is CRUCIAL) and made little ice cube trays of sorts out of it. Then I poured the hot hot sugar into the "mold" I had made and let them cool, then popped them out and set them on the cake.  Voila, ice in the bucket.  And you know what?  They tasted like cotton candy to me! 
The cake was done.  Gosh, that was the condensed version, and I'm pooped out!  I wish I was more proud of it than I am, you know?  I spent SO much time and energy on it.  At least it tasted good!  I did get an email from the Clients today that told me that everyone LOVED the cake and it was SOOOO good, so that makes me feel really great...but I really wish I could have knocked this one out of the park for these people.  But, as a good friend of mine told me about this situation, we have to have bad experiences in order to appreciate the good ones.  She is so smart! :)
I will post later today or tomorrow about the Race Track Cake.  The Client is bringing little matchbox cars for the top, and I want a picture of it all finished!

Sunday, February 28, 2010

Flower Power!

  Another week, and another cake!  After last week, my housework got WAY behind, and I was sort of looking forward to just chilling out and cleaning the house...okay.  Maybe not looking forward to cleaning the house, but you get the picture.  Then I got an email from a lady asking about a rush job for another Sweet 16 cake!  I love these kind of things.  You have people that have almost given up hope on getting the cake they want.  You can almost feel the resignation that they will end up either paying $600 or just going to Walmart for their cake through the internet.  At any rate, They sent me a few pictures, and I gladly accepted the challenge!
  I had a heck of a time with the fondant.  The first two tiers I covered I messed up on.  They just dried out too quickly.  In order to re-do them, I had to make more fondant and wait 8 hours for the batch to cure.  ARGH!  But I eventually got it and covered and stacked the tiers.  Blank slate.  White cake.
I rolled out a black fondant ribbon 1.5" wide and wound it around the bottom tier.  Then I started putting on the vines.  It was relaxing work, but definitely something different.  After putting on the vines, I placed the ribbons around the cake and secured them at the back.  Since they are satin, I couldn't use water or gumpaste glue under them.  I secured one end, wrapped the cake, and secured the other end with a dab of the glue.  This left an ugly little mess at the back of the cake.  Probably not noticeable to anyone but me, but gosh I didn't want to leave it there.  Anyhoos.  I cut and placed the flowers.  I had moulded the numbers for the top of the cake on Monday night, the night the clients came over, so they had ample time to dry.  They had craft sticks pushed up into them before they dried, so they were pretty secure.  I wound a few vines around them and attached flowers.  Then I covered the cake board with black fondant and placed the bottom (orange) ribbon.  I made a template for the name on the board, then scrapped that.
Block lettering didn't seem to fit the vibe of this cake, so I rolled out another long snake of fondant and wrote her name in cursive.  For the tittle, I made a little tye dye fondant using all the colors I used on the cake and cut out a little flower.  It was uber cute, I think!
  I then turned my attention to the back of the cake.  It was very plain.  The birthday girl had told me she didn't mind if it was just plain, but I really wanted to spruce it up and I had extra fondant, so I started playing with it.  I cut out a massive amount of flowers and went to work sprucing it up!
I love how the back turned out.  It reminds me of the back of a wedding dress, you know the ones that have the buttons going all the way down the middle of the back and down the skirt?  Anyway.  I had a good time!
Then when the Mamma and Daughter came to get the cake, they LOVED it and the girl gave me a wonderful letter telling me how pleased she was and how thankful she was.  It truly made my week!  My husband was so happy for me, too.  That is just really thoughtful for a 16 year old, you know what I mean?
Well, this week is over and I made another cake for a family member, but we ended up not getting together, so I'm probably going to give this cake away on Craigslist tonight.  It's kind of a bummer but no real biggie.  It was a fun little cake and I really enjoyed doing buttercream grass on it.
  With the leftover cake from the soccer cake, I experimented for the first time with cake balls.  What you do it crumble up cake, mix it with buttercream frosting, and ball it up on the end of a stick.  Then you freeze it nice and hard.  Then you take milk chocolate and melt it on a double boiler, add a teaspoon of shortening, and stir it up.  Then you swirl the frozen cake balls into the chocolate until they are nice and covered, then you put them in the fridge, then...you eat them!  I'm really looking forward to making these more often.
What a good use of that extra cake you cut off the top of the domed cakes and the extra little bit of buttercream you're invariably left with.
  I'm contemplating using ganache to cover the next cake.  I'll keep you posted.