Showing posts with label hot glue. Show all posts

Wednesday, January 11, 2012

Tiny little craft

I don't know that you'd even consider this a "real" craft, but I had a little spot open on the wall in-between some picture frames.  I had leftover stones from the candle sconce project, so I took a string and hot glued on 15 stones in graduated colors, then put a screw in the wall, tied the string on, and hot glued the top rock to the screw to cover it.  Here it is:

Stinkie loves to mess with it.  Weirdo.  Here's how it looks on my wall:
My husband has a thing for those photo collage frames.  See my candle sconce up there?  My little heart flutters every time I see them.
I finished another little scrapbook paper wreath for the upstairs bathroom and put it up.  Now there are two!  I am going to wait until I get that wall where I want it, then make a post for that.
I am also working on a hemp pendant lamp for hanging above my huge comfy chair in my living room.  I need to go out and get the rest of the stuff for it today.  Here's a teaser:
Long Days and Pleasant Nights, Everyone!

Monday, January 9, 2012

Dollar Store Stone Candle Sconces

Hi!
  I love this new thing.  I used the tutorial found here.

I bought everything I  needed piecemail throughout the week.  Budgeting all these crafts is a difficult task!  Figure 5-8 bucks for some of them and it really adds up when you're working with $20/week total play money.  Sidenote here, I love Dave Ramsey.  Love him.  Budgeting has never been so fun and rewarding.
So anyway!  Back to the crafting!  I bought some clear tacky glue from Wally World and had my wonderful hubster cut blocks (7"x5.5" and 3.5"x5.5") out of the old shelving we used to have up under the TV.  I used the same spray paint I used for the lamp to transform the white laminated particle board into a pretty bronze.  I have a towel I use to spray paint on.  I really love the little circles and squares left white after spraying around the base of something.  The lines are so crisp and clean!
I attached the pieces with L-brackets and put picture hanger saw tooth thingies on the back (SO technical here!)  Hubby and I watched an episode of Breaking Bad while I glued on the dollar store rocks mosaic-style.  I let them dry overnight and couldn't wait this morning to hot glue the little dollar store candle holders on them.  They are too cute!  I wanted to put one on either side of the doorway from the kitchen to the living room, but in the interest of brevity and not wanting to move the large mirror on the other side of the doorway, I just arrange them around the photo frames.

Lit up:

I am in love!  I am going to make more of these.  Total cost for BOTH (everything except the paint and wood) was $5, candles included!

Saturday, January 7, 2012

A Cake and a Flop

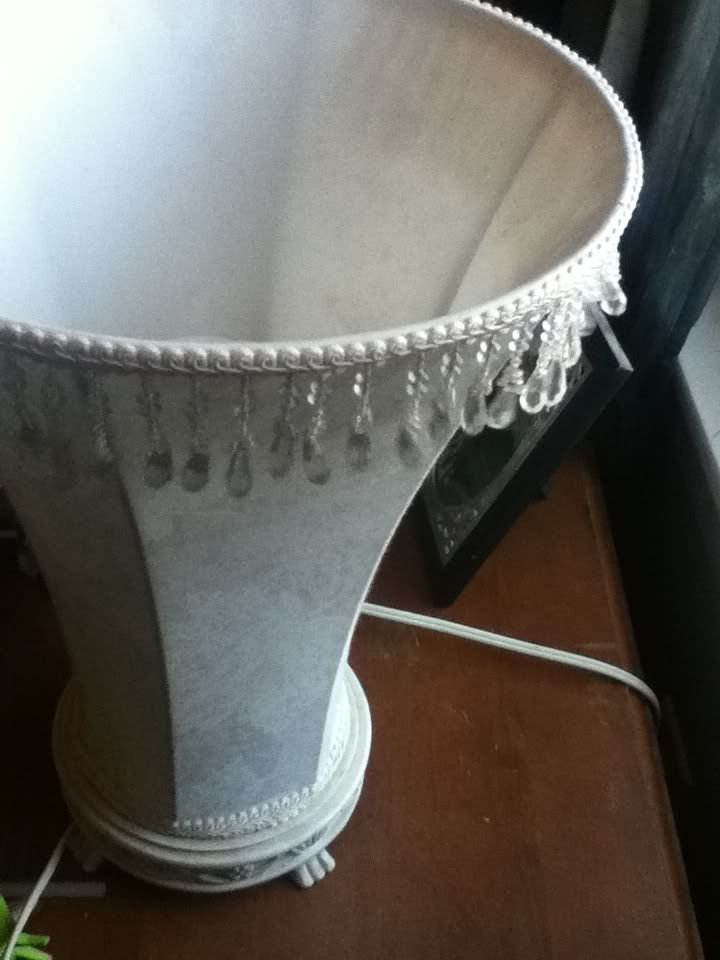
Yesterday I made something...unusual.  I found some great ideas off CraftGawker and Pintrest that I wanted to try out, so I chose a lamp that I really liked but didn't fit our style anywhere:

And decided to alter it.  I bought 1/2 yard of cream and brown fabric and cut them into 2" strips.  I like to fold the fabric over and over so I don't have to cut straight for very long to make each strip.  They ended up looking like this:

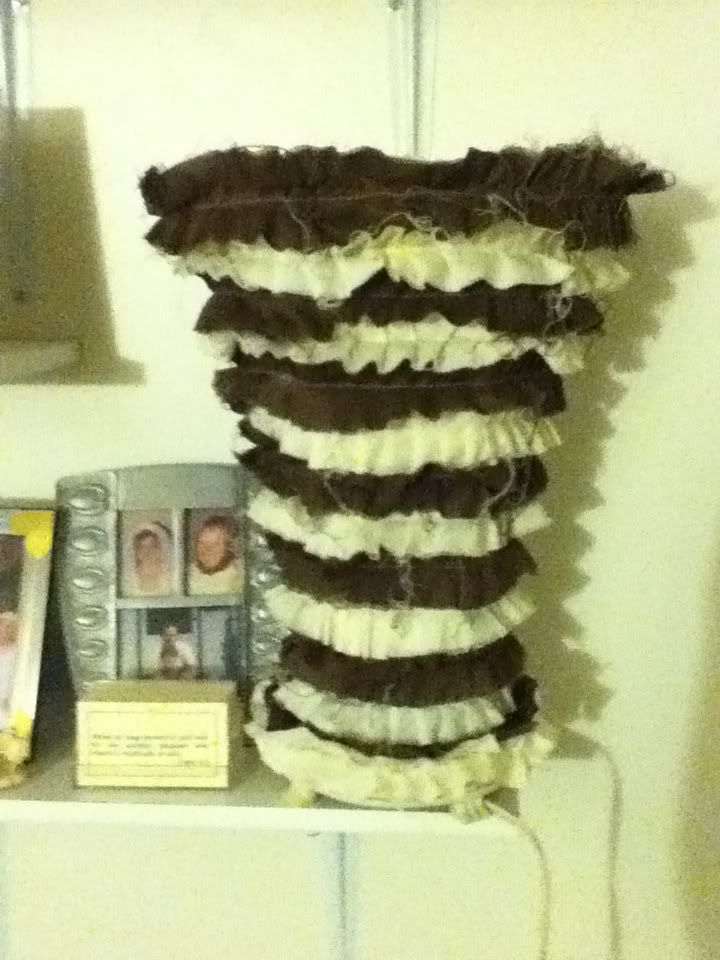
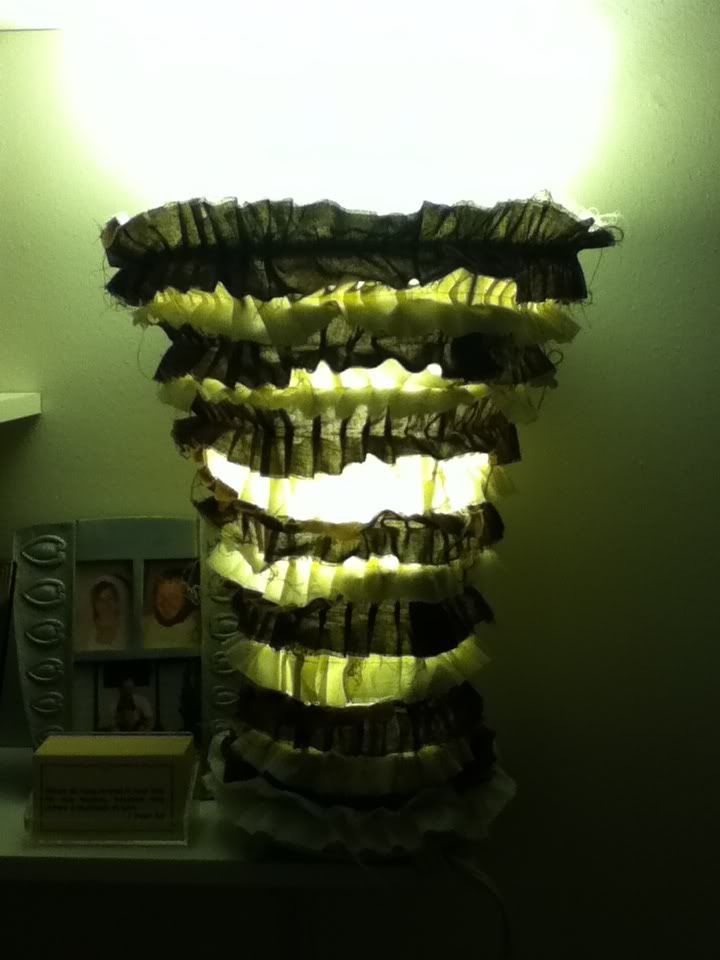
I cut off the beads from the top of the lamp, then I started sewing down the middle of each strip to create a ruffle.  9 stitch tension and 4 (longest) stitch length.  This went really fast.  Then I hot glued the stitched part to the lamp, starting at the bottom and alternating colors.  This is where I think I went wrong, for it ended up looking like something from the 70's traveled forward in time and threw up on the lamp:

And lit up it looks like this:

The colors are meh.  I am very dissatisfied.  I wish I had randomized the colors, bought two more colors, and instead of doing straight lines, let them meander all over the lamp.  I did fray the edges of the fabric strips to try giving it a little more appeal, but it's just ugly and I'm feeling down about it.


The bright point is the cake I made for a very special little boy in my life who turned 1!  His Mama and Daddy decided on a balloons/rainbow theme and pretty much left the design to me.  I wanted it to be special, so I made the inside a rainbow and didn't tell anyone until it was cut.  The little smash cake was rainbow inside too!  It was fun and looked like this:

The inside looked like this:

To achieve the look, I made up a batch of White Almond Sour Cream cake (WASC on Cakecentral.com) that was 1400 or so grams in weight.  I put 200g into each of 7 bowls and mixed in a LOT of color.  I wanted it to be very vibrant.

I put 100g of each color into 2-8" rounds.  I measured these by using the tare function on my awesome digital scale.  I let it settle naturally between each color so it spread well and more evenly.  Next time, I am going to coat the entire pan with the red and use more red than any other color so it shows up more, and go less and less as I get closer to the center.  Does that make sense?  Anyway, after I shaved the top to make it level, it looked like this:

I was so happy with how pretty and loud the colors came out.  Yay!  Happy Birthday little buddy!